| broker | ||
| console | ||
| data | ||
| docs | ||
| mqtthandler | ||
| scripts | ||
| streamer | ||
| .gitignore | ||
| docker-compose.yaml | ||
| mediamtx.py | ||
| mediamtx.yml | ||
| radio.py | ||
| README.md | ||
| requirements.txt | ||
| ubx.py | ||
MQTT Device Manager & Web UI
Features
- Device interface via MQTT: The Standard for IoT Messaging
It is designed as an extremely lightweight publish/subscribe messaging transport that is ideal for connecting remote devices with a small code footprint and minimal network bandwidth.
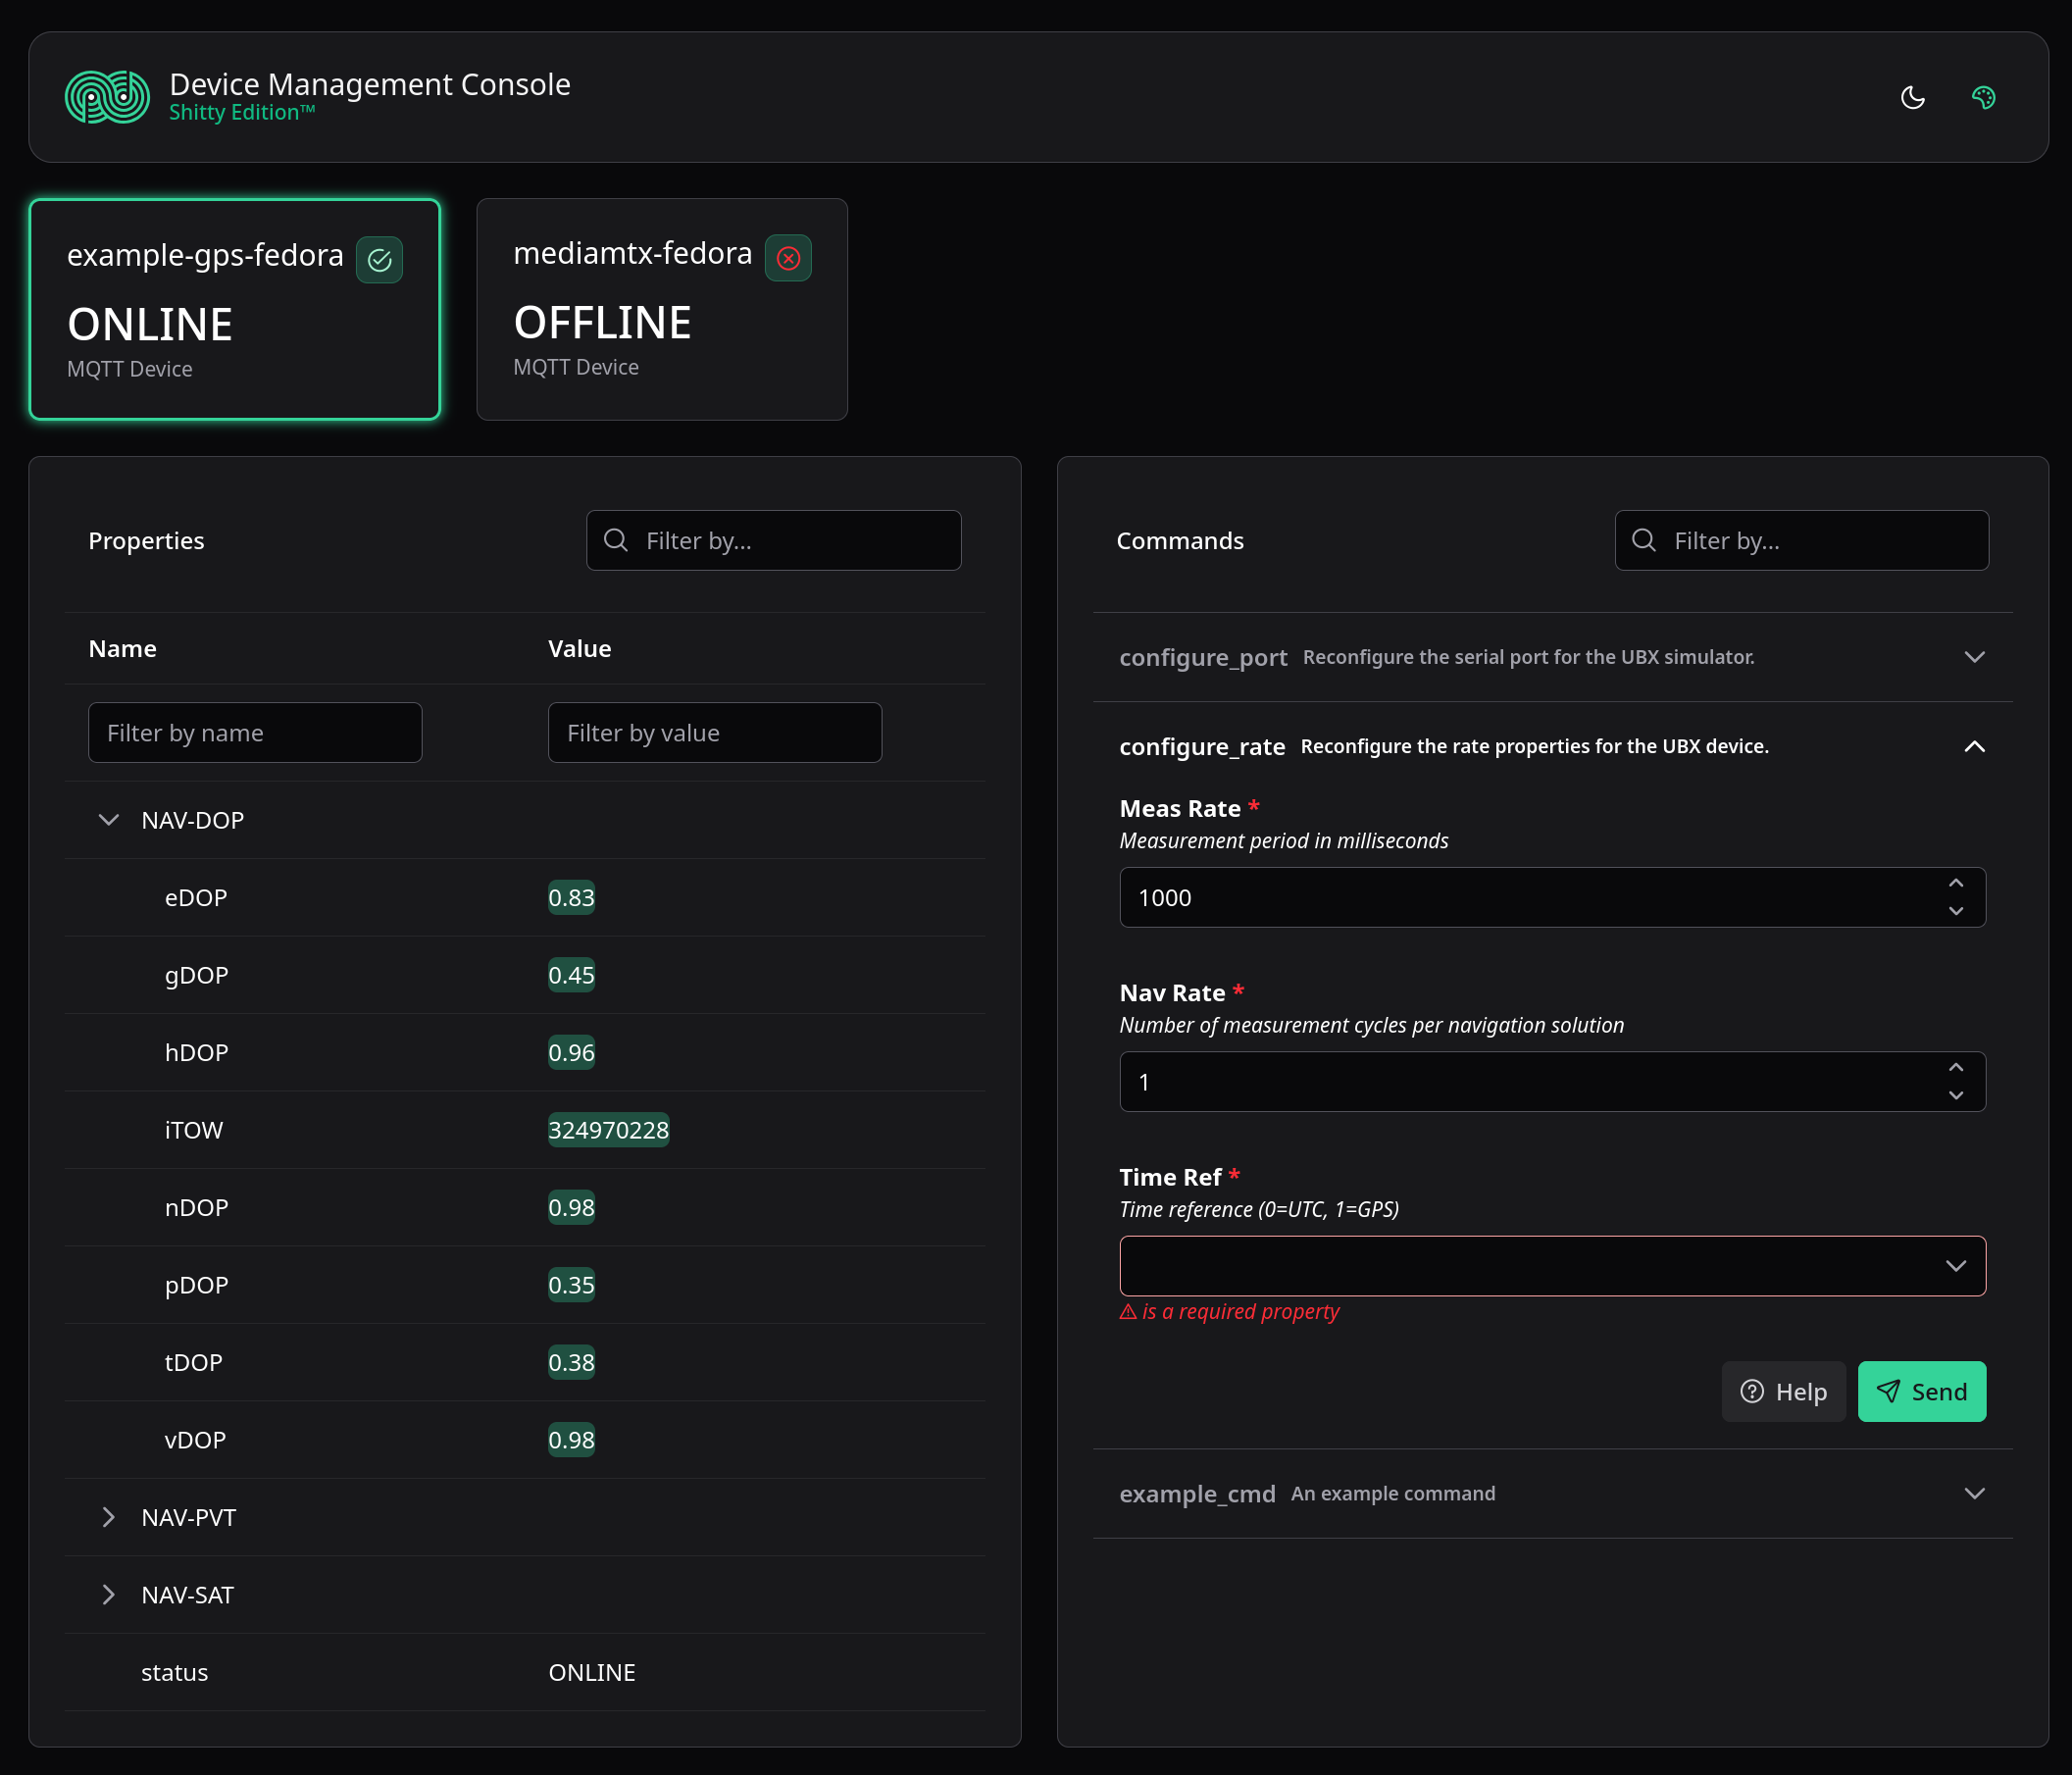
- Device properties are automatically discovered & subscribed from MQTT topic structure
- Commands annotated with JSON Schema
- Input is validated according to schema with python-jsonschema
- Schema is passed directly to the frontend for form generation with JSONForms
- Reactive Vue frontend
- Fast, realtime updates due to pub/sub architecture
- Property search by name, name fragment or value
- Flash effect on property update
- Frontend schema validation for commands with human readable error messages
Building a basic device
Building a new device that integrates with the wider system is very simple. All of the required functionality is already baked into the base class MQTTHandler, so a functional device can be derived in just a few lines of code.
class ExampleDevice(MQTTHandler):
    def __init__(self, name: str):
        super().__init__(name)

if __name__ == "__main__":
    async def main():
        device = ExampleDevice("example-device")
        await device.run("127.0.0.1", port=1883, username="<user>", password="<pass>")

    asyncio.run(main())
This by itself is sufficient to create a new device named example-device which will connect to the broker and report a device/+/meta/STATUS property, which can be tracked through the UI.
Commands
Commands are added to devices by decorating member methods with the @command decorator. Upon MQTT connection the base class will scan for all decorated class methods and automatically register them with the broker. Upon receiving command requests from the broker, these class methods will be called directly.
Note: methods with the @command decorator must be async.
To expand on the previous example by adding a command that clients may call:
@command(
    {
        "type": "number"
    },
    "An example command",
    additional="data can be added as kwargs",
    foo="bar"
)
async def example_cmd(self, args):
    print(f"Executing command with args {args}")
The first argument to the decorator is the schema to which incoming command requests must adhere. Checking for correct schema inside the command is not required as this will have already been validated by the base class. Any JSON Schema declaration is accepted, and the method param args will be an object matching the given schema. There will only ever be one argument provided; schemas of type object will be passed as a dictionary.
The second argument is the command description, which will be reported verbatim to the user on the web UI, alongside the schema. If additional properties or data is needed, they can be attached using **kwargs.
Properties
Adding properties to a device can be done dynamically at any time. There is an option to first register a property, adding a validation schema and description, but properties may also be published directly without a schema. MQTT fields are exposed using **kwargs, allowing direct control of message QoS and retainment policies. To publish properties on device initialisation, it is best to use the @task decorator on a class method, similar to @command.
@task
async def initialise(self):
    await self.set_property("custom-property", "value")
    await self.set_property("custom-property-2", 13, qos=1, retain=True)
As with @command, the base class will enumerate the decorated class members upon connection to the broker and schedule them with the event loop. This is useful for either short-running initialisation tasks as well as for launching long running jobs, such as communicating with external hardware.
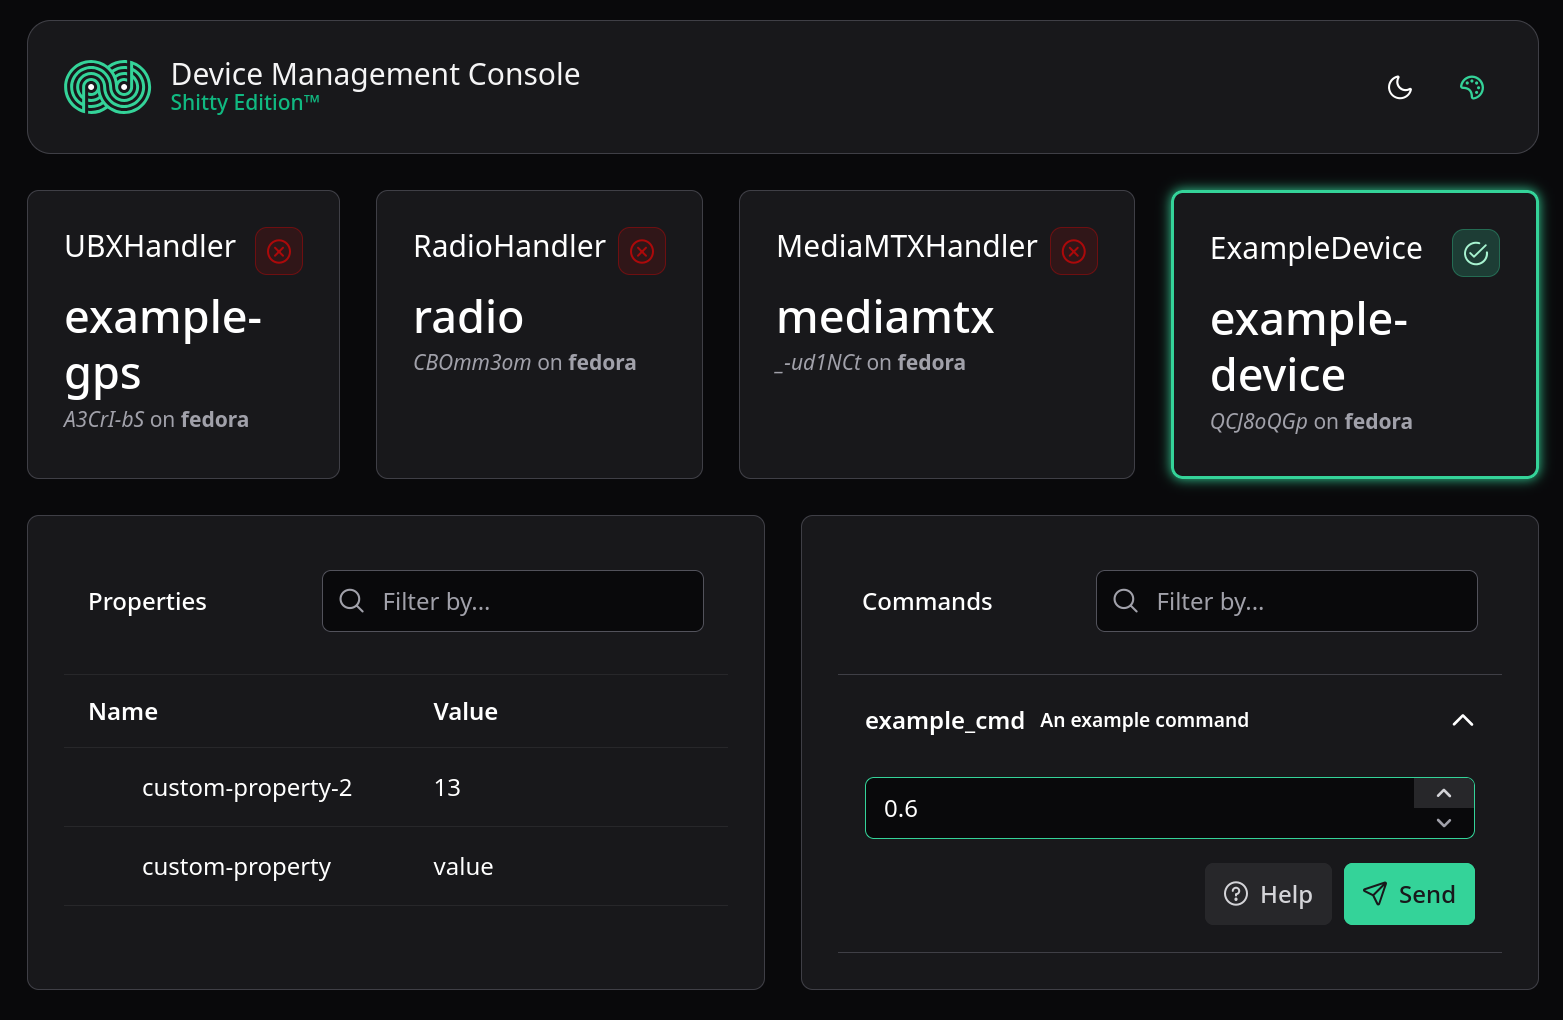
Complete example
A complete implementation of a device, with both commands and properties, is as follows:
import asyncio
from mqtthandler.command import command
from mqtthandler.handler import MQTTHandler, task

class ExampleDevice(MQTTHandler):
    def __init__(self, name: str):
        super().__init__(name)

    @task
    async def initialise(self):
        await self.set_property("custom-property", "value")
        await self.set_property("custom-property-2", 13, qos=1, retain=True)

    @command(
        {
            "type": "number"
        },
        "An example command",
        additional="data can be added as kwargs",
        foo="bar"
    )
    async def example_cmd(self, args):
        print(f"Executing command with args {args}")

if __name__ == "__main__":
    async def main():
        device = ExampleDevice("example-device")
        await device.run("127.0.0.1", port=1883, username="<user>", password="<pass>")

    asyncio.run(main())
30 lines total in a single file. Isn't that nice? Why can't everything be this simple? This exact device is visible on the web UI in the following screenshot: